Saturday, April 27, 2013

Double Chocolate Brownies (gluten free, dairy free, egg free, nut free and soy free)

"All you need is love. But a little chocolate now and then doesn't hurt." Charles M. Schulz


Hello followers, I have exciting news to share! I am starting up my own little business doing insightful and fun cooking demonstrations. I will be at The Carter Farm Market & Café located in Norval, Ontario on Tuesdays evenings, starting on May 7th. I am specializing in hors d'oeuvres and guarantee that after watching my demos, you will be able to impress your own guests with delicious party fare at your future gatherings! Check out my website, look at my upcoming demonstrations menu, choose which hors d'oeuvres you'd like to learn how to make and sign up! See you at the Market Café! Ha!
www.sarahsculinaryadventure.com
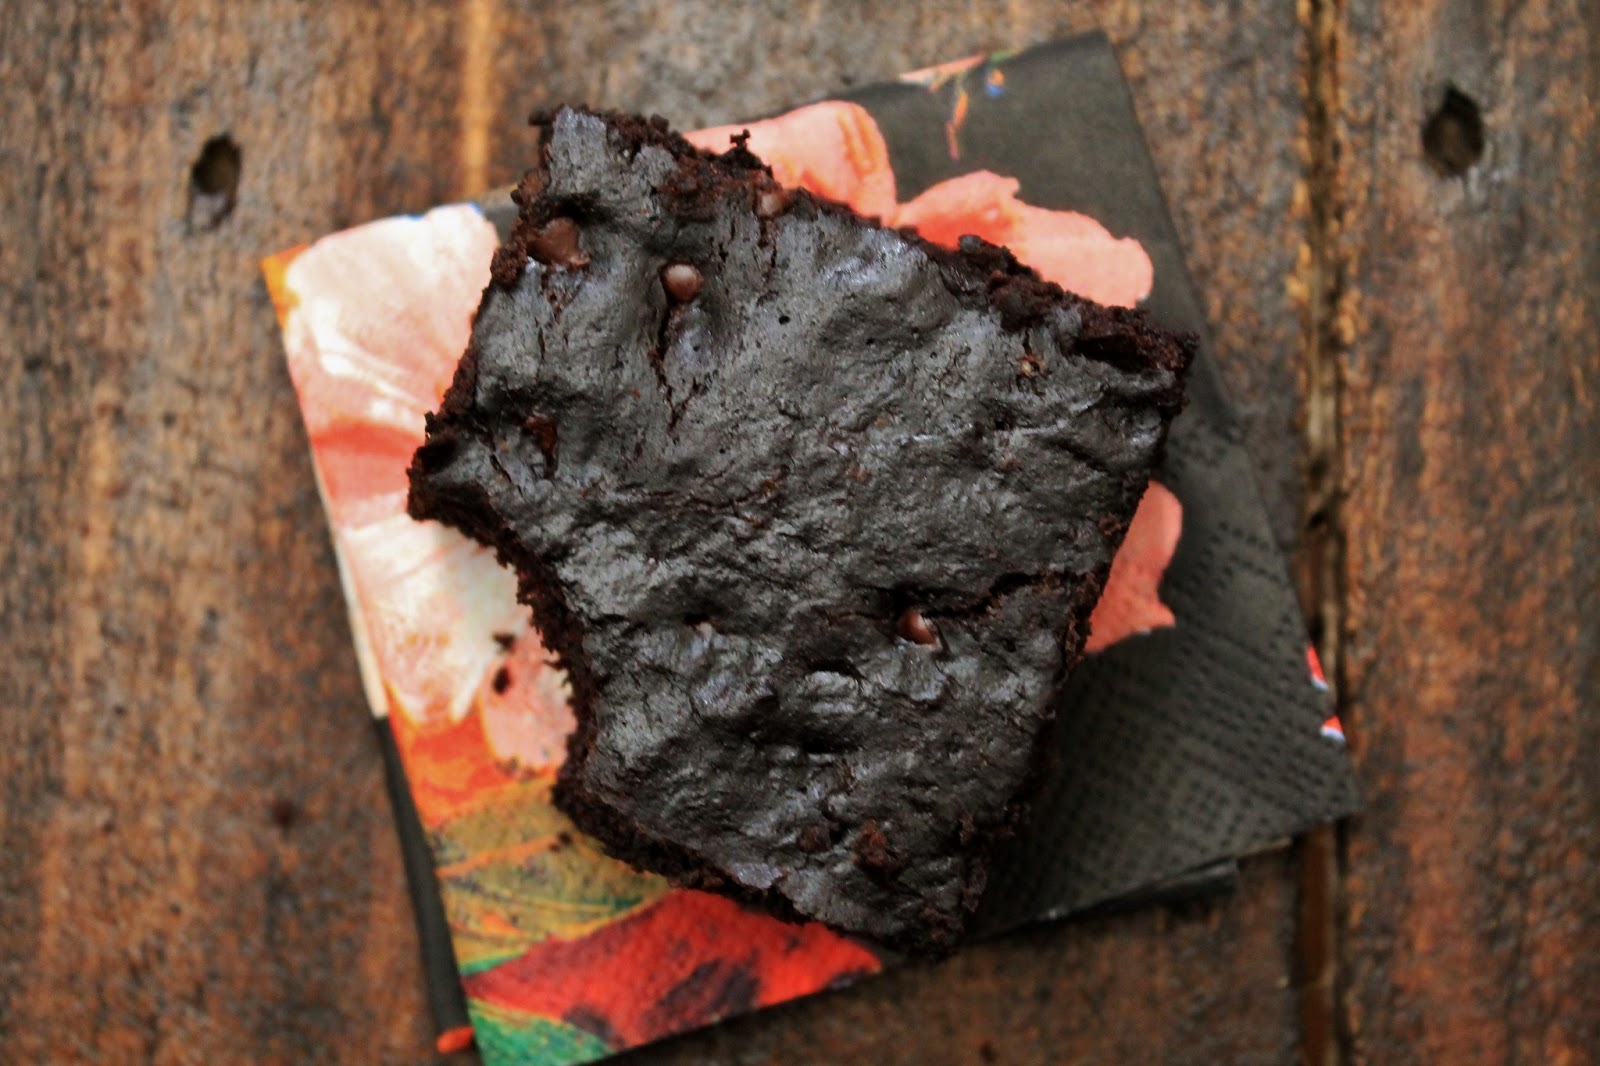
So, this week I have had a request from my friend Nancygail for a chocolate dessert that is gluten free, dairy free, egg free, nut free and soy free. I must admit that I had my reservations, but I think I actually did it! At first I was thinking of making a cake, but while perusing the organic baking aisle at my local health food store, I found some suitable chocolate chips and had an 'Ah ha!' moment. I remembered how good brownies were and thought that adding chocolate chips to a batch would make them twice as delicious! Rich and chocolaty, soft and chewy. Yum! So, with a bit of research and a few trials, I ended up with this creation!


Simple and Tasty Recipe:

Double Chocolate Brownies, Gluten, Dairy, Egg, Nut and Soy Free
(makes one 8x8" square pan)

2/3 cup white rice flour
1/3 cup tapioca flour
1/3 cup brown sugar
1/3 cup cocoa powder
1 tsp baking soda
1/2 tsp sea/kosher salt
1/2 cup fruit puree, or 1 ripened banana, mashed
1/3 cup veg oil
1/3 cup cold water
1 tbsp. fancy molasses/honey
1 tsp vanilla extract
1/3 cup chocolate chips (gluten, dairy, soy free)

Preheat the oven to 350 degrees. grease an 8x8" baking dish.
In a large bowl, combine the rice flour, tapioca flour, brown sugar, cocoa powder and salt. Mix well with a fork and make sure to break up any lumps. Stir in the banana, oil, water, molasses/honey and vanilla. Mix well until smooth, stir in the chocolate chips.
Transfer the batter into the greased square dish and smooth out evenly. Place in the oven and bake for 25 to 30 minutes. To have brownies that are on the denser, 'gooier' side, bake 20 to 25 minutes. Enjoy!
My family and I absolutely loved these brownies and not until they were all eaten, did I let them know that these brownies were 'special'! I used a mashed banana in my brownies, but apple sauce would also be great. I used molasses instead of honey for added sweetness. Let me know how they turn out, Nancygail and keep the requests coming! Alright followers, have a great weekend and I'll be back next week with a full report about the happenings in Norfolk County! That's right, we are heading up to our 10 acres of land tomorrow and I cannot wait! Until then!


Saturday, April 20, 2013

How to Grow Sweet Potatoes

Week Three Update

FACT: The Maori (indigenous people of New Zealand), have been cultivating the sweet potato, or kumara, since the 14th century A.D. 

Hiya followers! Enjoying the snow?!
As you can see, my sweet potato has really taken off! I'm just so proud! In one week, the slips have really grown and the leaves are getting much bigger. There are even a couple new little slips that have popped up. How exciting! I hope your sweet potatoes are also coming along and I cannot wait to see how much growth happens by next week. Until then, followers!


Thursday, April 11, 2013

How to Grow Sweet Potatoes

Week Two Update

FACT: Sweet potatoes are extremely high in beta carotene and vitamin C.

  
Hello followers! Did you start your sweet potato yet?
Mine has been in water for about two weeks now and it's beginning to sprout! Yay! These sprouts are called 'slips' and they are what will eventually be planted to grow our sweet potatoes. You'll also notice white roots growing out of the bottom of the potato. Amazing!


Kitchen Tip Number Five: Keep Your Magazine Off The Counter


One of my biggest pet peeves in the kitchen is having a magazine or thin cookbook on the counter while I'm getting ready to make a recipe! They get in the way and chances are that they'll get messy! They are too light to lean up against back of the counter and I really don't want to spend money buying a magazine prop-up-thingy! So, I find it much easier to hang it! Just find a hanger for pants, clip the magazine or thin cookbook and hang it off a kitchen cabinet door knob in front of you. This way your counter remains uncluttered, your magazine won't get splashed on and you're ready to get cookin'!


Thursday, April 4, 2013

How to Grow Sweet Potatoes

Step Number One

FACT: Sweet potatoes are actually the roots of a vine that belongs to the morning glory family.
 
Hiya followers, how fun is this?!
Growing sweet potatoes are extremely easy and I am going to guide you with each step of the way from start to finish! All you need for today's first step is a jar, some water, perhaps 5 toothpicks and an organically grown sweet potato. I started my sweet potato this past weekend, but now is a fine time to get started!
Choose a nice lookin' sweet potato and determine the thinner end from the rounder end. The thinner end will be submerged in water to grow roots.
Find a good sized jar that is wide enough to fit your sweet potato. If it is too wide, stick some toothpicks into the sides of the potato (about 1 cm deep), all the way around. This will keep your sweet potato from falling into the jar.
Place your sweet potato, skinny end down, into the jar and fill with water until the bottom 2 cm of the potato is submerged.
Put the jar on the sunny window ledge and let nature work her magic!
So, now it's just a waiting game to watch the roots grow out of the bottom and see slips growing up out of the top of the sweet potato. I'll be back next week with an update!
Good luck!


Wednesday, April 3, 2013

Chewy Breakfast Bars, Gluten Free

'When you wake up in the morning, Pooh' said Piglet at last' 'what's the first thing you say to yourself?' 'What's for breakfast?' said Pooh. - A. A. Milne, 'The House at Pooh Corner'

 
If you live in the Toronto area, everything you'll need for today's recipe can be found at The Big Carrot health food store. I've been there many times and always enjoy it!
Today's recipe is a request from adventuresome cook, Catherine. She loves to experiment and one thing she has tried and tried again, with mixed results, is the perfect gluten free breakfast bar. I have never attempted anything like it myself, so I asked Catherine for her list of staple ingredients and began to research. Through my reading, I found that there seems to be two types of bars out there, one a hard and one chewy. I decided to go with the latter simply for one simple reason: crumbs. I'm sure no one wants to be dashing out the door to work with their breakfast bar crumbling apart! Well, at least I wouldn't! By the way Catherine, I did come across some bars that used avocados! Ha!

 
Simple and Tasty Recipe:
 
Chewy Breakfast Bars, Gluten Free
(makes 12 to 16 bars)
 
1 cup dates, chopped and pitted
2 bananas, very ripe (not frozen)
1/2 cup nut or seed butter (I used almond butter)
1/4 cup fat such as melted butter, vegetable oil or coconut oil (I used melted butter)
2 tsp vanilla extract
1 tsp cinnamon
*1- 2 tbsp natural sweetener such as honey, agave or molasses *optional
1 egg
1 cup oats, old fashioned and gluten free, 1 tbsp set aside for garnish
1 cup mixed seeds, roasted (I used sunflower, flax and pepita), 1/4 cup set aside for garnish
1 cup mixed dried fruit (I used golden and Thompson raisins, cranberries and chopped apricots)
1/2 cup chopped nuts, roasted (I used pecans)
 
Preheat oven to 350 degrees.
In a food processor add in the dates, bananas, almond butter, the fat, vanilla and cinnamon. Process until smooth. Taste the batter, if you feel it isn't sweet enough, add in *1-2tbsp or so of your fave natural sweetener. When adjusted, add in the egg and process for a few more minutes.Transfer the batter into a large bowl and stir in the oats, mixed seeds, mixed dried fruit and nuts, remembering to set some aside for the top. Line a 9x13 tray or oven proof dish with parchment paper. Pour the mixture onto the parchment and smooth it out evenly. Sprinkle the reserved seeds and oats over the top and lightly pat them down. Place into the oven for 20 to 25 minutes until golden brown and when a toothpick is inserted into the middle, it comes out clean. Allow the tray to rest for about 10 minutes, then cut into bars of your desired shape and size. Enjoy!
Well, as you can see there is a lot of room for experimenting to make these bars your own! Just try to keep the proportions of the ingredients the same as the original recipe. If the bananas aren't very ripe, add some sweetness. Use tahini instead of the almond butter or substitute sunflower, cashew or peanut butter. Use the fat you prefer, I know people who swear by coconut oil. Please feel free to change the seeds, dried fruit and nuts. Coconut would also be a great addition.
I hope you like these gluten free breakfast bars, Catherine! Please let me know how they turn out and what adjustments you made to make them truly yours!
Bye for now, followers and I'll be back next week with another culinary adventure!