Friday, September 30, 2011

Poached Ontario Pears in Cranberry Juice, Sideroads of Halton Hills Magazine

"Fruits poached in a syrup gain flavor and sophistication, as well as easing the pressure on a busy cook." The Silver Palate Cookbook


Hello followers!
Well, didn't summer pack up and leave as quickly as she came into town?! I shouldn't complain though, for now we are all reaping the harvest of late summer and early fall! It's a great time for locally grown produce and the perfect time to start cooking inside again. Heck, with the chill in the air these days, it's nice to have the stove or oven on to warm up the kitchen! I have been doing quite a lot of cooking lately, mostly developing and testing recipes for Jane Rodmell of Cottage Life Magazine. I have been working on several ideas for two issues of the magazine. Believe it or not, the work is being done for March and May 2012! They certainly like to work ahead! Besides working for Cottage Life, I have also been doing my own recipes for the Sideroads of Halton Hills Magazine (they only work on deadlines that are 2 months ahead! Ha!)! I am currently coming up with ideas for the winter issue, meanwhile the fall issue just came out this week! So, today I have decided to share the recipe I developed for poached pears. Extremely easy to make and (as it says in today's quote...), sophisticated in appearance, they are a perfect dessert to wow your guest. Just make sure to choose locally harvested pears that are still firm, as soft pears would fall apart while poaching. If you'd like a closer look, just click on the article below to enlarge!
Okay followers, it is time to bid you all adieu! I know I haven't been blogging much this summer, but I am thinking that once our wedding is over, I will definitely have more time! So many people told me that a wedding is hard work and there would be a lot to do... Well, they weren't lying! I just hope that with all of our hard working and planning, that we will have a great day for all of our guests to enjoy! Bye for now followers and I will be back with more culinary adventures (and wedding adventures! Ahh!)!

Wednesday, August 31, 2011

Chipotle BBQ Sauce

"Always do your best. What you plant now, you will harvest later." Og Mandino

Helloooo followers!
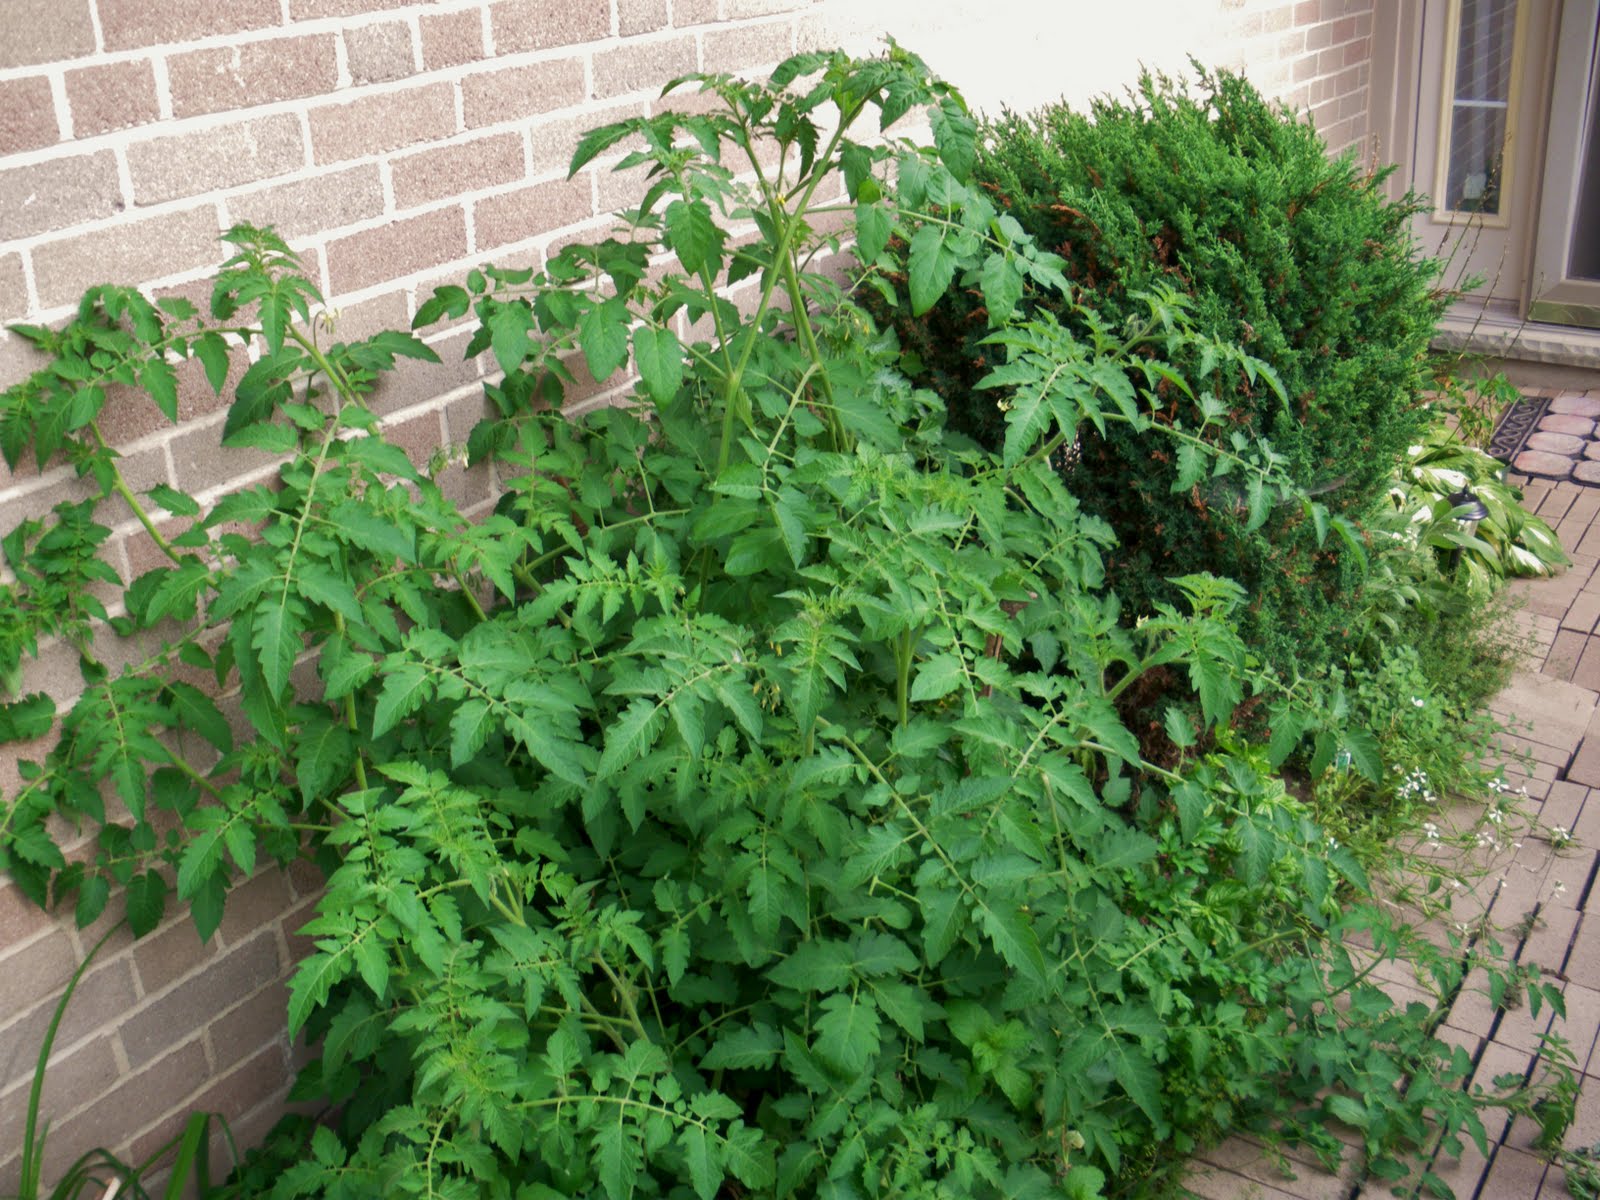
Well, I think you'll find that today's quote fits perfectly! In my last blog, I told you all that the next culinary adventure would be to introduce you to our little garden. In the spring, my sweetie Kevin and I planted out a herb garden, arugula patch, cherry tomatoes, yellow grape tomatoes and jalapeno peppers. Well, as you can see from the before and after photos below, we certainly are harvesting now!! Our tomatoes plants have grown out of control and now we eat them in one form or another every night for dinner! Thank goodness that my fave salad is a caprese (found on my 'Simple & Tasty Recipes' page), and I'm so happy to say that I have turned Kevin's dad into a fan as well! It has been so wonderful being able to simply open the door and pick fresh herbs all summer long! Kevin certainly loves having his jalapeno plants within reach and I have to tell you, these little guys are like no other jalapenos I've ever tasted!! They are super hot, let me tell yah! Super duper hot!! And speaking of hot, my recipe for today is a spicy BBQ sauce. It is a request from my friend Pete, who happens to love chipotle peppers. And for those of you that might not know this, chipotles are actually smoked red jalapeno peppers! In every grocery store these days, chipotle peppers are readily available in tins, packed in an adobo sauce. This is the type of chipotle I use in this easy summer recipe!


Simple and Tasty Recipe:

Chipotle BBQ Sauce
(makes about 2 1/4 cups)

2 cups ketchup
2 Tbsp apple cider vinegar
1 tsp Worcestershire sauce
1 Tbsp Dijon mustard
2 Tbsp brown sugar
1 tsp chili powder
1/4 tsp garlic powder
tinned chipotle peppers, chopped (as many as you want!!)
1 Tbsp tinned adobo sauce

.place all of the ingredients into a pot, heat on medium low and simmer for about 5 mins to meld the flavours, enjoy!
How easy is that?! This BBQ sauce can be made as mild or as hot as you like, just add more chopped chipotles! Use it with anything or everything you like to barbecue, it caramelizes really nicely. I also used some to make spicy beef fajitas not too long ago, delish! In a sealed container, this sauce will keep for a month or so in the refrigerator.
Well followers, summer is quickly coming to an end... So, so sad! I really miss last summer when I was freelancing and was lucky enough to blog daily. My mum, best friend Mary and sister-in-law Michelle have all told me (several times), that they liked it better when I wasn't working full time. And I must admit, I did too! It's been a great summer, though and I hope you all have had one as well! Okay followers, time to go... I will be back soon and the culinary adventure will continue! Bye for now!


Sunday, July 31, 2011

Sideroads of Halton Hills Magazine

"It's a cruel, cruel summer..." Bananarama


Hello my loyal followers! Gotta love the heat!
Well, it's been a while, hasn't it?! To tell you the truth, I haven't been blogging because I haven't been cooking much. Such hot summer days call for simple salads and anything that can be quickly prepared on the grill. Luck is on our side though followers, because the summer issue of 'Sideroads of Halton Hills' magazine has come out and with it, my three latest recipes (and if you look closely, you'll see that I made the cover! Yay!)! I really hope that these recipes will make up for my absence! And with the promise of rain and some cooler weather on the horizon, I promise to get back on track developing new recipes and blogging more often! I already have my next adventure planned for you... Let's just say that it's time to introduce you all to our tiny garden! Till then my followers, please stay cool and have some summer fun!
P.S. So fresh and explosive with flavour, my chimichurri recipe knocked my socks off when I first made it! It's my fave steak condiment ever!

Grilled Shrimp Skewers with Thai dipping Sauce


Flank Steak with Chimichurri
Barbecued Fruit Gallette


Saturday, June 11, 2011

Stewed Ontario Rhubarb

 "It's spring fever. That is what the name of it is." Mark Twain

 
Good day, my followers!
Well, I might as well fess up and admit that I too have spring fever! Yee ha! I got it so bad that I have to tell you, I am finding it hard being inside to write this blog... When it isn't raining you'll find me working in our lil' garden or simply sitting outside flipping through a cooking mag. This spring has had it's ups and downs and I feel the need to take full advantage before it ends! Last week I told you about Andrew's Scenic Acres in Milton, where my sweetie Kev and I have been picking our own asparagus. Well, we have been picking our own rhubarb as well! Rhubarb seems to be one of those things that people either love or hate. Unfortunately, Kev claimed that he hated rhubarb, until I made today's recipe and won him over! Stewed rhubarb is a seasonal treat that is so easy to make and is most popular in my family. Though we traditionally eat our stewed rhubarb over custard, I enticed my sweetie by offering it up over ice cream. Definitely a different experience for me, but none the less delicious!


Simple and Tasty Recipe:

Stewed Ontario Rhubarb
(serves 4)

4 cups rhubarb, chopped (fresh or frozen)
1/2 cup sugar
2 tbsp water
1 tsp vanilla or 1 vanilla bean

.place all ingredients in a pot, simmer on medium low for about 15 minutes until the rhubarb is soft and it has thickened slightly, enjoy!

Didn't I tell you it was easy?! Now, I prefer my stewed rhubarb a bit tart, so please feel free to adjust the sugar to your own taste. Not only delicious with custard or ice cream, this stewed rhubarb would be delicious served over cake as well (look for Pound Cake on my 'Simple & Tasty Recipes' page). Also, I just had some over plain Greek yogurt for my breakfast and it was fantastic! I swear, this recipe with win anyone over to the rhubarb loving side!
Well, my followers, I will not be posting a blog next week for I am going on a road trip! Yippy! My cousin Marie is visiting from England and a gang of us are taking her to Montreal, Mont Tremblant and Ottawa for a week! It will be mine and Marie's first trip to Montreal and I suspect we are going to love it! Then once we are back, I am off for a three day camping trip with Kevin's family. Talk about fun! I have a feeling that both trips will be full of new and exciting culinary adventures and I promise to document each and every one of them! Enjoy these lovely springtime days my followers and I will be back soon! Au revoir, mes amis!


Link:
Andrew's Scenic Acres, http://www.andrewsscenicacres.com/

Friday, June 3, 2011

Ontario Asparagus, Arugula and Cheese (with Ham) Frittata

"Farmers feed cities!"


Hello followers, enjoying the weather?!
Well, spring is finally in full swing! It feels like our new season is long overdue, so it is a race to get back on track. Last weekend, my sweetie Kev and I took full advantage of this time of year and got out into the countryside. On our trip we had some great experiences, including something that neither of us had ever done before... We went asparagus picking! How exciting! We jumped in the car and took the easy drive along #10 Sideroad out to Milton's Andrew's Scenic Acres and Scotch Block Winery. I'd driven past the sign pointing the way dozens of times but had never ventured out. Well, I'm so happy that we did because Andrew's is my new fave haunt! With over 600 acres, the busy farm produces a variety of fruit, vegetables and flowers, many of which are 'pick your own.' Some of the harvested fruit is used to supply the Scotch Block Winery. The on site winery boasts 28 fruit wines and I must say, the ones we sampled were delicious! I had never tried fruit wine before and found it very flavourful and refreshing. We bought a bottle of blackcurrant and gooseberry wine. Yum, yum! Leaving the farm, we noticed a sign on the side of the road that advertised brown eggs and maple syrup. Why not?! We turned off #10 Sideroad onto RR#3 in Georgetown and wound up at an exciting farm owned by Doug and Diane McPhail. We bought 2 dozen farm fresh, extra large eggs and noticed the all of the birds. The McPhail's have a large array of exotic birds and foul and Diane said we could have a look. From a distance we could see a peacock with his feathers up and I was lucky enough to snap a picture! So, with our newly picked asparagus and farm fresh eggs, I decided to make one of my staple meals... A frittata. A frittata is an Italian omelette which can be made with just about any ingredient you have in your fridge and it only takes minutes to make. Let's get started!


Simple and Tasty Recipe:
 
Ontario Asparagus, Arugula and Cheese (with Ham) Frittata
(serves 4)

2 tsp olive oil
1/2 bunch asparagus, rinsed well and sliced
handful of arugula
handful of chives, chopped
*3 to 4 slices ham, chopped (optional)
1/4 cup grated cheese (I used asiago)
8 eggs, beaten
sea salt
fresh ground pepper

.heat a non-stick pan on medium, add the oil and toss in the asparagus with a pinch of salt and pepper
.fry until the asparagus is cooked through (about 5 mins)
.meanwhile, beat the eggs in a bowl, add a pinch of salt and pepper and turn the oven on to broil
.add in the chives, arugula and ham (if using) to the pan and stir until the arugula is wilted, turn the heat down to medium low
.pour in the eggs, sprinkle the cheese on top and cook until the bottom and sides are set, about 3 to 4 mins
.place the frying pan under the broiler and cook until the eggs have completely puffed up, are fully cooked and the top has lightly browned, another 3 to 4 mins (use this timing as a guideline, everyone's stove tops and ovens vary in heat)
.serve from the pan or run a heatproof rubber spatula around the edge of the frittata and release it onto a plate or platter, sprinkle with a little extra cheese and pepper if you like and enjoy!

Now, if you have a plastic handle on your non-stick pan that will melt under the broiler, do not worry! There is a trick! Simply wrap the handle in tin foil, shiny side out, et voila!


 I like to serve this frittata at any meal, with any side. At brunch with potato latkes, at lunch or supper with salad and a yummy vinaigrette (check my 'Recipes' page for my 'House' and 'Balsamic' dressings). I also like to serve my frittata along side grilled bread with extra virgin olive oil. I simply broil thick slices of fresh bread at the same time as the frittata, brush the slices with good quality extra virgin olive oil and serve. I hope you try out this recipe and enjoy it as often as Kevin and I do! Alrighty my fun loving followers, get out there and enjoy spring and I will be back with another recipe featuring more seasonal ingredients next week!

Farmers Feed Cities, http://www.farmersfeedcities.com/